Se non conoscete ancora la presa intelligente della TP-Link è ora di conoscerla… e acquistarla! Qui potete acquistare la HS100 che ha solo lo swtich on e off. Mentre qua per soli 5 euro in più potete acquistare quella con anche il monitoraggio della corrente.

Dovete prima di tutto creare un sensore virtuale che sia di tipo Wall socket. Inserite in on e off questi due (cambiate ovviamente gli IP).
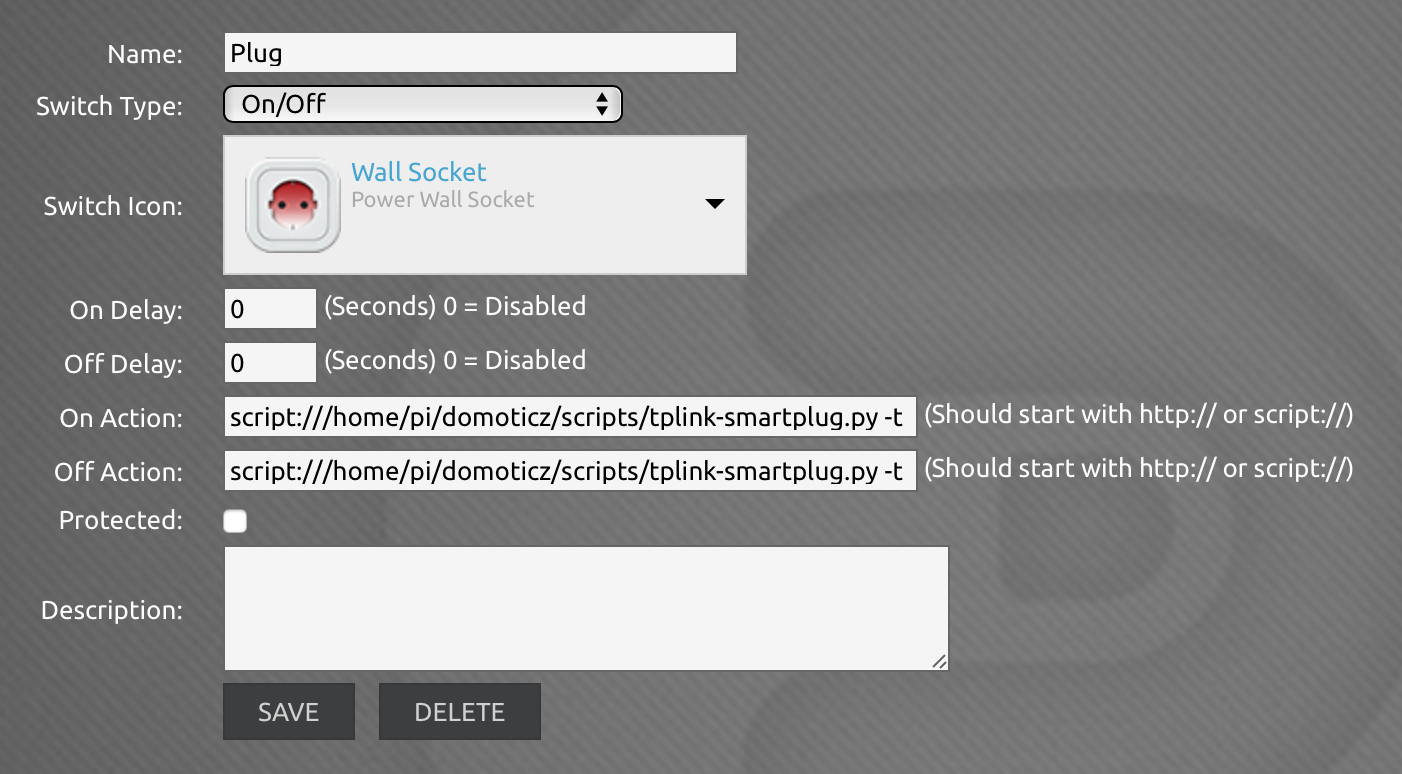
Per il tasto on:
script:///home/pi/domoticz/scripts/tplink-smartplug.py -t 172.24.1.123 -c on
Per il tasto off:
script:///home/pi/domoticz/scripts/tplink-smartplug.py -t 172.24.1.123 -c off
Non premetelo ancora! Prima create lo script monitorare il consumo:
sudo nano /home/pi/domoticz/scripts/HS110.py
E incollate:
#!/usr/bin/env python
#
# TP-Link Wi-Fi Smart Plug Protocol Client
# For use with TP-Link HS110: energy monitor
#
# Gets current power (W) and cumulative energy (kWh)
# and sends to Domoticz
import socket
import argparse
import json
import urllib
import urllib2
# ip, port, and command for HS110
ip = '172.24.1.123'
port = 9999
cmd = '{"emeter":{"get_realtime":{}}}'
# Domoticz command stub and IDx of HS110
baseURL = 'http://127.1.1.1:8080/json.htm?type=command¶m=udevice&nvalue=0'
HSIdx = 456
# Encryption and Decryption of TP-Link Smart Home Protocol
# XOR Autokey Cipher with starting key = 171
def encrypt(string):
key = 171
result = "\0\0\0\0"
for i in string:
a = key ^ ord(i)
key = a
result += chr(a)
return result
def decrypt(string):
key = 171
result = ""
for i in string:
a = key ^ ord(i)
key = ord(i)
result += chr(a)
return result
def domoticzrequest (url):
request = urllib2.Request(url)
# request.add_header("Authorization", "Basic %s" % base64string)
response = urllib2.urlopen(request)
return None;
# Send command and receive reply
try:
sock_tcp = socket.socket(socket.AF_INET, socket.SOCK_STREAM)
sock_tcp.connect((ip, port))
sock_tcp.send(encrypt(cmd))
data = sock_tcp.recv(2048)
sock_tcp.close()
# print "Sent: ", cmd
result = decrypt(data[4:])
jsonData = json.loads(result)
# print "Received: "
# print json.dumps(jsonData, indent=4, sort_keys=True)
power = jsonData['emeter']['get_realtime']['power']
total = jsonData['emeter']['get_realtime']['total'] * 1000
# print power, total
except socket.error:
quit("Cound not connect to host " + ip + ":" + str(port))
# Send data to Domoticz
try:
url = baseURL + "&idx=%s&svalue=%s;%s" % (HSIdx, power, total)
domoticzrequest(url)
except urllib2.URLError, e:
print e.code
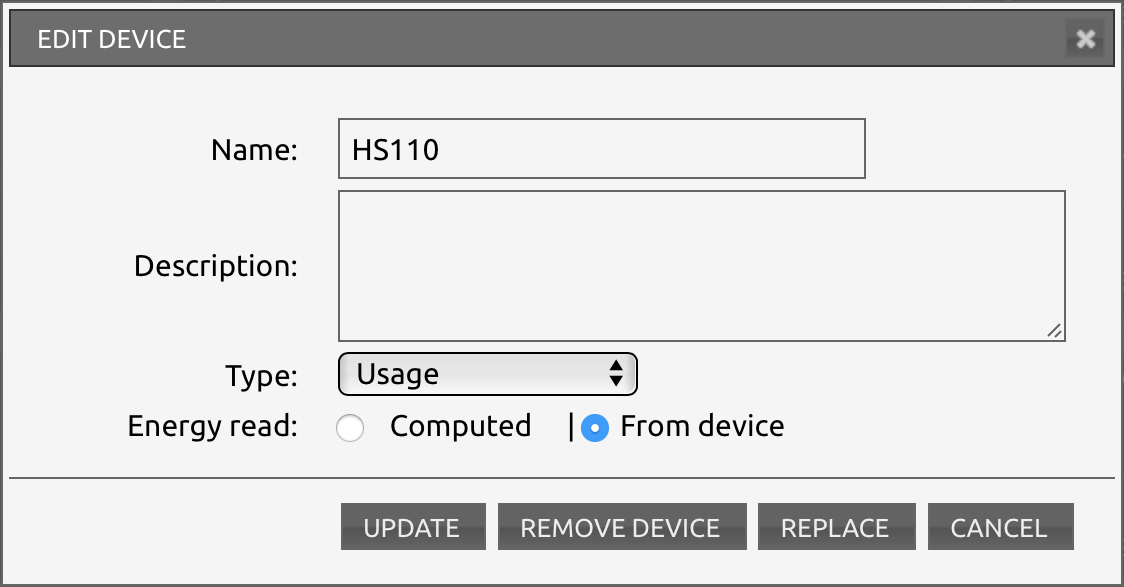
Create un altro sensore virtuale per monitorare il consumo:
Mentre questo sudo nano /home/pi/domoticz/scripts/tplink-smartplug.py incollate:
#!/usr/bin/env python
#
# TP-Link Wi-Fi Smart Plug Protocol Client
# For use with TP-Link HS-100 or HS-110
#
# by Lubomir Stroetmann
# Copyright 2016 softScheck GmbH
#
# Licensed under the Apache License, Version 2.0 (the "License");
# you may not use this file except in compliance with the License.
# You may obtain a copy of the License at
#
#      http://www.apache.org/licenses/LICENSE-2.0
#
# Unless required by applicable law or agreed to in writing, software
# distributed under the License is distributed on an "AS IS" BASIS,
# WITHOUT WARRANTIES OR CONDITIONS OF ANY KIND, either express or implied.
# See the License for the specific language governing permissions and
# limitations under the License.
#
#
import socket
import argparse
version = 0.1
# Check if IP is valid
def validIP(ip):
try:
socket.inet_pton(socket.AF_INET, ip)
except socket.error:
parser.error("Invalid IP Address.")
return ip
# Predefined Smart Plug Commands
# For a full list of commands, consult tplink_commands.txt
commands = {'info'     : '{"system":{"get_sysinfo":{}}}',
'on'       : '{"system":{"set_relay_state":{"state":1}}}',
'off'      : '{"system":{"set_relay_state":{"state":0}}}',
'cloudinfo': '{"cnCloud":{"get_info":{}}}',
'wlanscan' : '{"netif":{"get_scaninfo":{"refresh":0}}}',
'time'     : '{"time":{"get_time":{}}}',
'schedule' : '{"schedule":{"get_rules":{}}}',
'countdown': '{"count_down":{"get_rules":{}}}',
'antitheft': '{"anti_theft":{"get_rules":{}}}',
'reboot'   : '{"system":{"reboot":{"delay":1}}}',
'reset'    : '{"system":{"reset":{"delay":1}}}'
}
# Encryption and Decryption of TP-Link Smart Home Protocol
# XOR Autokey Cipher with starting key = 171
def encrypt(string):
key = 171
result = "\0\0\0\0"
for i in string:
a = key ^ ord(i)
key = a
result += chr(a)
return result
def decrypt(string):
key = 171
result = ""
for i in string:
a = key ^ ord(i)
key = ord(i)
result += chr(a)
return result
# Parse commandline arguments
parser = argparse.ArgumentParser(description="TP-Link Wi-Fi Smart Plug Client v" + str(version))
parser.add_argument("-t", "--target", metavar="<ip>", required=True, help="Target IP Address", type=validIP)
group = parser.add_mutually_exclusive_group(required=True)
group.add_argument("-c", "--command", metavar="<command>", help="Preset command to send. Choices are: "+", ".join(commands), choices=commands)
group.add_argument("-j", "--json", metavar="<JSON string>", help="Full JSON string of command to send")
args = parser.parse_args()
# Set target IP, port and command to send
ip = args.target
port = 9999
if args.command is None:
cmd = args.json
else:
cmd = commands[args.command]
# Send command and receive reply
try:
sock_tcp = socket.socket(socket.AF_INET, socket.SOCK_STREAM)
sock_tcp.connect((ip, port))
sock_tcp.send(encrypt(cmd))
data = sock_tcp.recv(2048)
sock_tcp.close()
print "Sent:     ", cmd
print "Received: ", decrypt(data[4:])
except socket.error:
quit("Cound not connect to host " + ip + ":" + str(port))
Ora potete impostare un’automazione che esegua lo script di controllo del consumo e che aggiorni l’IDX corrispettivo.

Per comodità ho messo come IP della presa 172.24.1.123 e come IDX 456 (cercateli nei due script e modificateli).
Se non volete creare l’automazione che controlli il consumo, semplicemente create un altro sensore virtuale che al tasto on abbia come parametro:
script:///home/pi/domoticz/scripts/HS110.py
Abbastanza semplice no?
Dopo che avrete monitorato i consumi per qualche mese avrete a disposizione un bel grafico su cui poter lavorare:
