Dopo aver capito come creare un container per SickChill, oggi vediamo come avere un certificato https e quindi (ovviamente) una connessione sicura quando lo utilizzate sulla porta 8081.
Spostatevi dentro:
/docker/sickchill/config
Generate il certificato compilando tutti i campi che vi vengono richiesti:
sudo openssl req -x509 -nodes -days 365 -newkey rsa:2048 -keyout server.key -out server.crt
Vi comparirà qualcosa del genere:
Generating a 2048 bit RSA private key
...................................+++++
....+++++
writing new private key to 'server.key'
-----
You are about to be asked to enter information that will be incorporated
into your certificate request.
What you are about to enter is what is called a Distinguished Name or a DN.
There are quite a few fields but you can leave some blank
For some fields there will be a default value,
If you enter '.', the field will be left blank.
-----
Country Name (2 letter code) [AU]:US
State or Province Name (full name) [Some-State]:New York
Locality Name (eg, city) []:New York City
Organization Name (eg, company) [Internet Widgits Pty Ltd]:SickChill
Organizational Unit Name (eg, section) []:Sick
Common Name (e.g. server FQDN or YOUR name) []:10.0.0.2
Email Address []:sick@domain.com
Poi andate nelle impostazioni di SickChill e compilate i campi come nello screenshot:
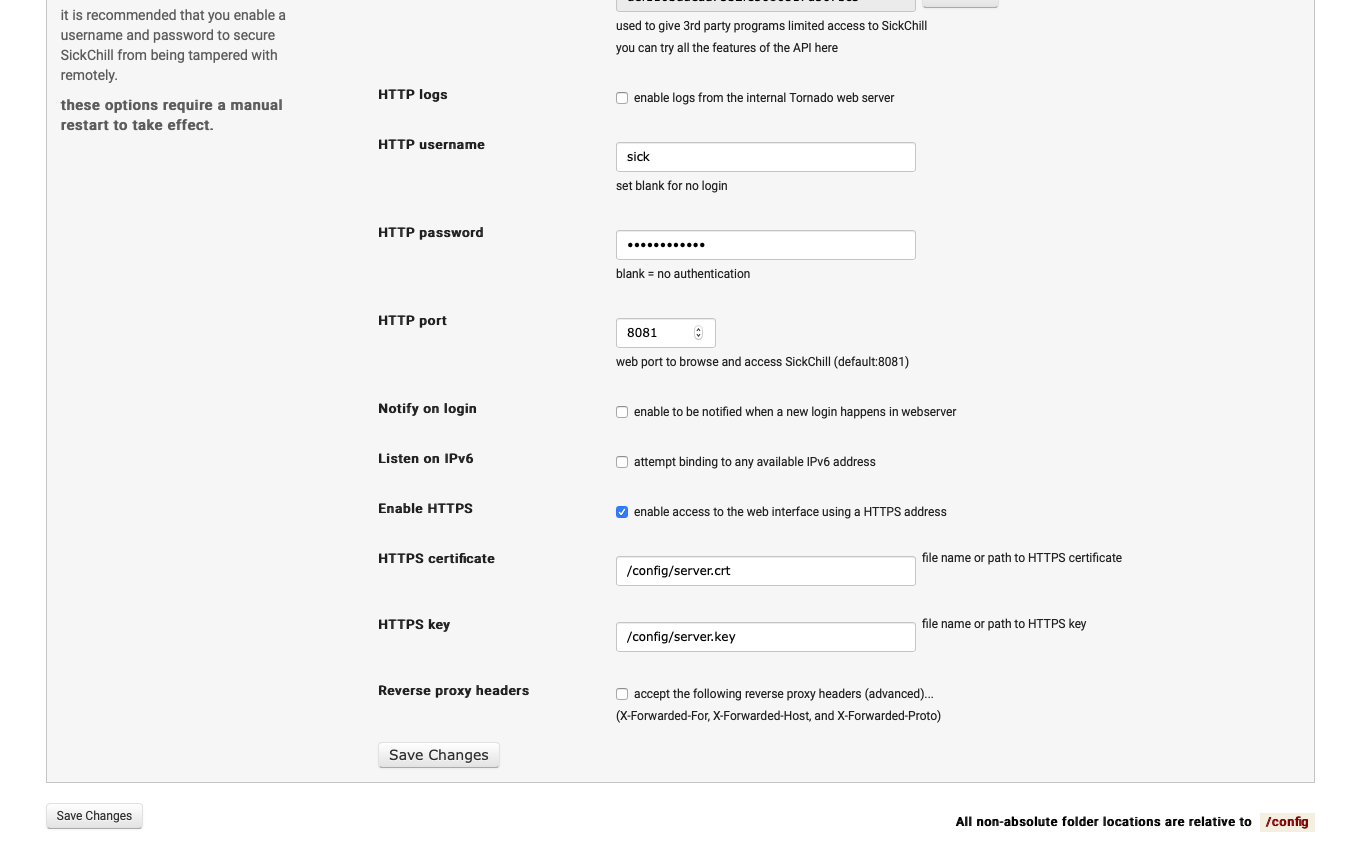
Nel caso vogliate anche avere un accesso tramite password, inseritela nel campo di testo corretto!